
If you are a beginner, the first time you download the datasheet of the microcontroller you are using, you will be given a 1000 to 2000 page document, which will make you feel uncomfortable, to say the least. I have been through the same experience and in this post, I am going to help you understand the reason behind the hugeness of the datasheet and I will give you some tips and tricks so that you don’t waste too much time reading it!
So let’s begin!
The reason behind the hugeness
The manufacturers of microcontrollers need to explain its capabilities, electrical and mechanical characteristics, and the peripherals it has and how to interact with those along with the register interface it provides. They do that through this document called the datasheet so that everything you need to know about the microcontroller is all in one place.
If you have bought an electronic device recently, say a digital watch, you would have noticed some manual that came with it explaining the capabilities of the device, what are its parts, what the various buttons on the device do, how to handle the device, how to dispose of it once you are done with it etc,.
The datasheet serves the exact same purpose. The only difference being the fact that the datasheet is more technical since the end-user is an engineer like you!
Your microcontroller has peripherals instead of parts in your watch, and there are registers instead of buttons. In order for you to interact with the peripherals, you need to set and reset bits of particular registers. So basically if you need to turn a particular GPIO pin on, the datasheet will tell you which bit to set in what register to turn that particular GPIO pin on.
Your electronic device probably has 2 to 4 parts and maybe 4 buttons, but a microcontroller will have about 20 to 40 peripherals and maybe 5 registers for each peripheral, coming to about 100 to 200 registers each with 8 to 16 bits/switches! This is the main reason behind the hugeness of the datasheets!
Next, let’s look at some tips and tricks to help you find the details you need from the datasheets.
Tip #1: Just read the first few introductory pages of the datasheet thoroughly
If you just purchased a microcontroller for your project, or maybe if you are looking around to get a microcontroller that will suit your project, then the best place to start is the introductory section of the datasheet.
First, you need to get familiarized with the microcontroller. To do that, manufacturers usually provide an introductory section at the beginning of the datasheet. This section will contain the information you need in a condensed format and the length will usually be around 5 pages maximum.
Tip #2: Start prototyping on development boards using the software provided by the manufacturer
If you are just beginning your project, it’s normally considered a good idea to start your project development on a development board rather than developing on custom hardware. Development boards serve 3 purposes
- They usually come with a lot of examples and hence your first prototype can be built on top of these examples
- They are tested and hence you don’t have to have this doubt in the back of your mind if a particular source of a bug is in hardware or in software and
- You can get a better idea to decide if the idea you have in mind can be developed using this development board or not, as not everything will be clear during the brainstorming phase.
The reason we are interested in is reason #1, which is the examples provided with it. Almost all the manufacturers these days provide a Hardware Abstraction Layer, or in other words, they provide the drivers needed to talk to various peripherals. All you need to do is write your application on top of that.
These drivers are usually bug-free and hence you can potentially build entire projects without having a single look at the datasheet since the peripheral drivers are already given to us!
So go ahead and learn the examples and the driver library of the manufacturer first using a development board, instead of writing your own drivers. Once you are able to prototype on top of a development board, all you need to do is make some minor modifications to the software to make it work on the custom board!
Tip#3: Use a proper pdf reader
The pdf datasheet documents are usually organized into several chapters and subchapters, so I recommend not to read it through your browser but rather go for a dedicated pdf reader like Adobe or Foxit or use Preview if you are a Mac user, so that you can easily click through to the part you need on the sidebar with contents instead of scrolling up and down the entire day!
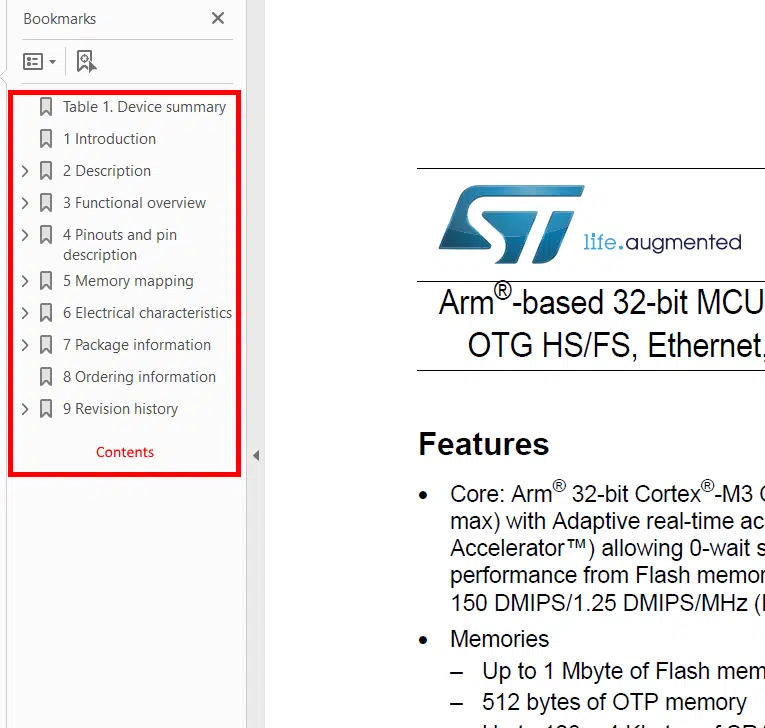
As you can see in the picture above, if you want to say have a look at the SPI section, all you need to do is open the sidebar and click on the SPI section and voila you are there!
You can also search the pdf using keywords if you are not able to find what you are looking for in the contents.
Tip#4: understand the register organization of peripheral
Usually, registers are organized into 2 main types,
- Status registers and
- Control registers
Every interface will have an input and an output. For example, your smartphones have a touch screen and power buttons as input, Display, and sound as outputs.
You can think of status registers as simply outputs of your microcontrollers where you can read the status of a particular peripheral, like if a particular GPIO input is ON or OFF.
Control registers on the other hand act as inputs to the peripherals, if you need to turn a GPIO pin ON, then you have to write to the control register of that GPIO pin!
Tip #5: If you don’t understand something, learn the basics of the peripheral first!
Sometimes datasheet information can be confusing. In those times, it’s better to go back and relearn the basics about the particular peripheral in question so that once you go back to the datasheet, your brain will automatically connect the dots and that particular part will become more clear!
Okay, I will stop here. Hope you guys learned something of value here!
You can email us or contact us through this link if you have any questions or suggestions.
If you liked the post, feel free to share this post with your friends and colleagues!