
In the last article, we saw the various parts of GitLab, its architecture and how GitLab works. If you haven’t already, I suggest reading the previous article first before reading this one. Here is the link
GitLab, A Complete Beginner’s Guide!
In this article lets look at how to set it up locally on your Linux PC, so that you can have your very own GitLab setup running right at your home or organization!
If you are using Mac or Windows, you can follow the links below.
Complete Guide To Setting Up GitLab Locally On Mac.
Complete Guide To Setting Up GitLab Locally On Windows PC..!!
So let’s begin!
Things you will need
All you need are a computer running Linux with enough resources (CPU, memory, and disk space) for running the GitLab Server and GitLab Runner. How much resources is enough depends on how much performance you need, the more you have the better it is!
You can also set it up on the cloud over at Gitlab.com, but
- the free plans have some limitations in terms of processing power and hard disk space.
- Also doing it locally gives you more control over the setup and
- it will also be an opportunity to learn you more about GitLab
Hence I suggest taking this route of a local installation.
If you are part of a larger organization, and you wish to install it on the cloud, then you can always take a look at the paid plans of GitLab here link
Approach to install GitLab on Linux
Okay, let’s get back to the task in hand.
As we saw in the previous article GitLab consists of 2 parts.
- GitLab Server and
- GitLab Runner
Also, we have learned in the previous article that it is preferable to set the GitLab server and runners on separate computers. But I am going for a home set up, so I will be setting them both upon the same Linux computer.
GitLab is heavily based on Linux technologies, so we will not run into any problems and the entire process should go smoothly!
By following the step by step guide shown below you should be able to set everything up and running in an hour or 2 (depending upon how good your internet connection is, it can take longer!)
GitLab Installation Process
I will be using Ubuntu distro for this tutorial since its the most popular distro among beginners.
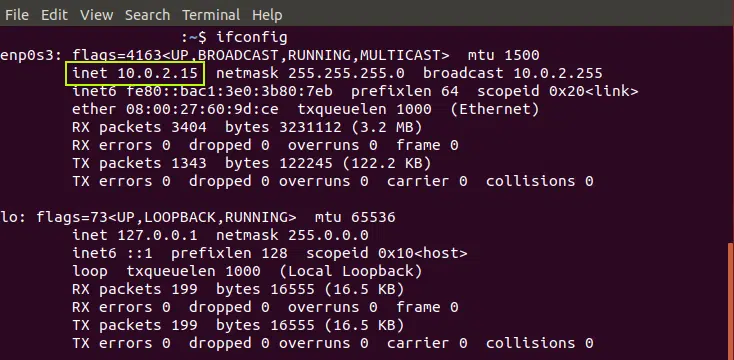
STEP#1: Get the IP address of your Linux Machine
So start up your Linux machine and open the terminal and type in the following command
ifconfig
and note down your IP address (inet addr in line 2 of the output as shown in the screenshot below)
STEP#2: Download and install GitLab server
To download GitLab server, go to the official link on the Gitlab’s Website
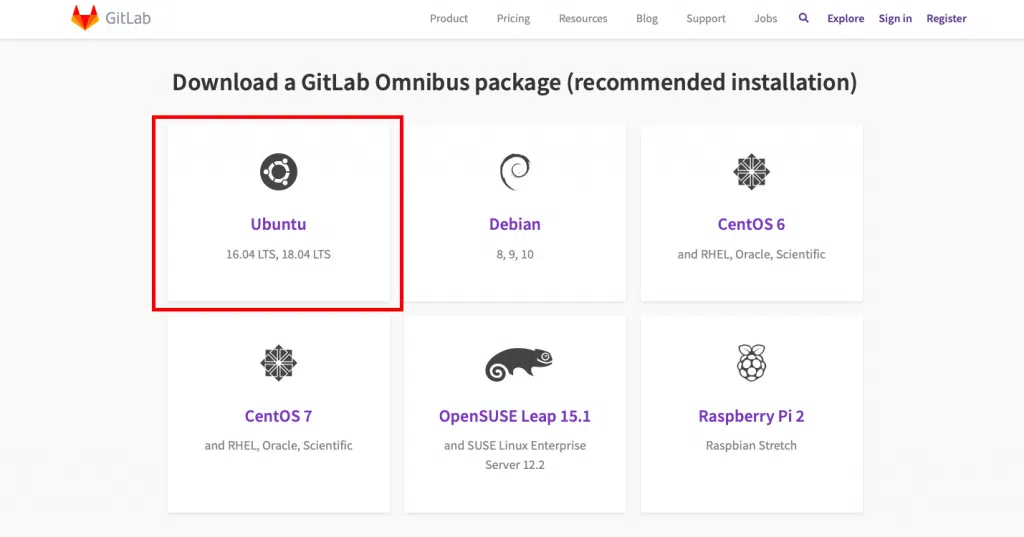
As you can see GitLab official supports several Linux distros, even a Raspberry Pi 2’s Raspbian! We are interested in Ubuntu, so click on the Omnibus Ubuntu Link on as shown in the screenshot above.
Once you click on Ubuntu, the commands you need to enter to install GitLab server will be shown to you.
I am not showing each instruction here since GitLab updates the information presented on their website all the time and that can make this section of the article outdated. Just follow the step by step instructions given in the link to install the GitLab Server on your Ubuntu machine.
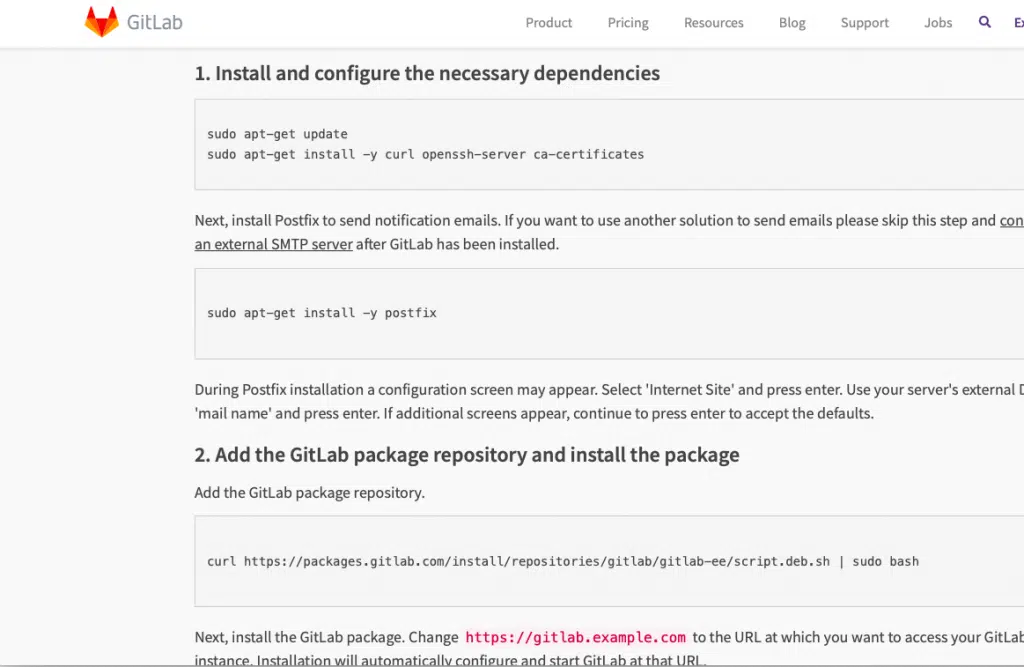
Just type in the commands shown there on you Ubuntu server’s terminal one by one to get GitLab Server installed.
A couple of tips on the GitLab installation instructions
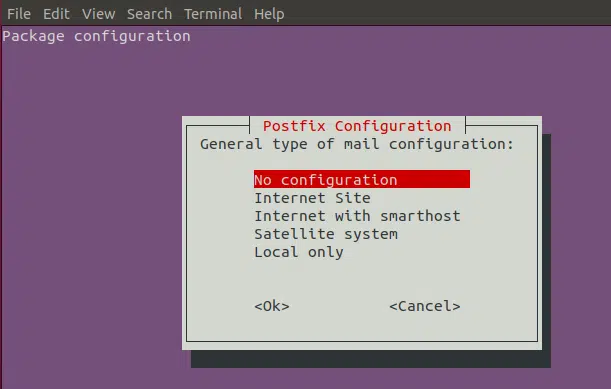
Tip#1
In the postfix installation step (step 1 last command on the GitLab website)
sudo apt-get install -y postfix
you can skip the mail option by choosing the “no configuration” option as shown in the screenshot below.
Tip#2
In the last command of step 2 at GitLab website
sudo EXTERNAL_URL="https://gitlab.example.com" apt-get install gitlab-ee
Make sure you replace the URL with the IP address of your ubuntu machine that we have made a note of in Step 1 above like this
sudo EXTERNAL_URL="192.168.0.116" apt-get install gitlab-ee
Or to be more precise just place the VM’s IP address that we obtained in Step#4 in its appropriate place
sudo EXTERNAL_URL=”<Your VM’s IP address>” apt-get install gitlab-ee
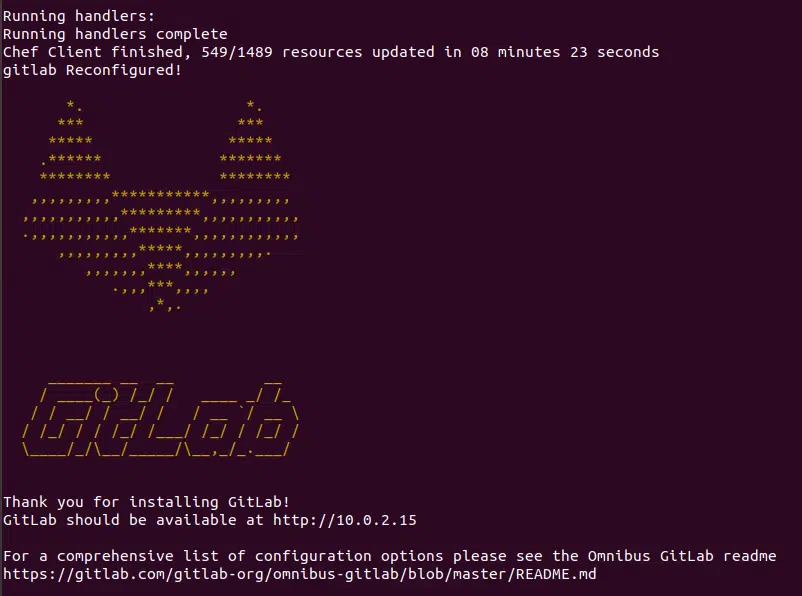
This step will take a while, so be patient. In my machine it took 8 minutes 23 seconds as shown in the screenshot below, yours can vary depending on the processing power it has.
Once done it will show u something like in the screenshot below.
Once it’s done, you can go ahead to your favorite browser and type in the IP address of your Ubuntu and check if the installation has succeeded.
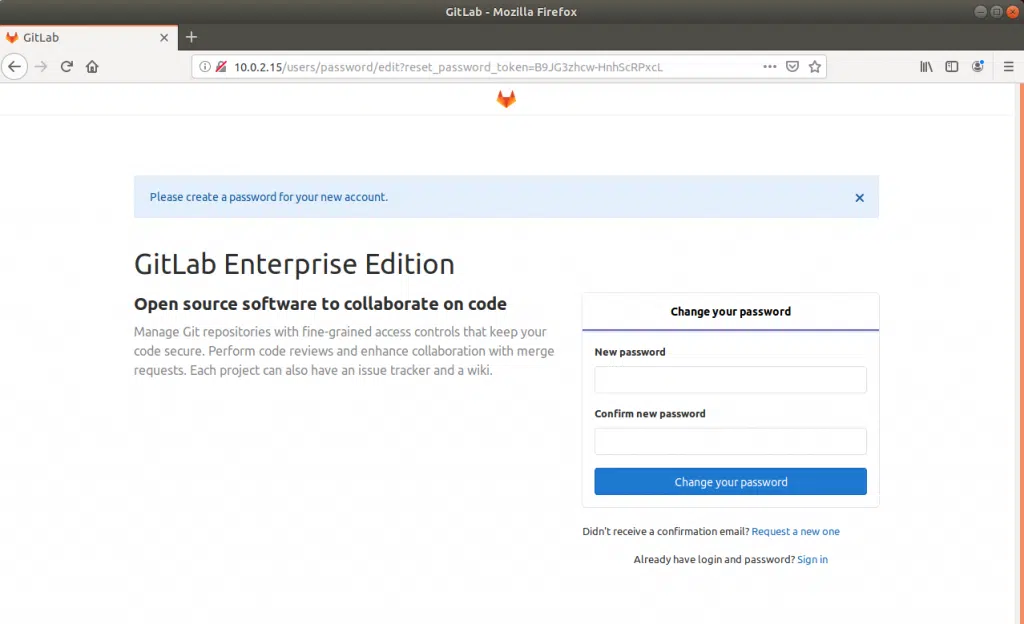
And voila! GitLab server installation has succeeded!
Go ahead and follow the onscreen instructions to set up your password, accounts and everything else!
STEP#3: Download and Install GitLab runners
At the time of writing this article, the installation commands needed are as follows.
curl -L https://packages.gitlab.com/install/repositories/runner/gitlab-runner/script.deb.sh | sudo bash
sudo apt-get install gitlab-runner
For up to date instructions please refer to the official link here
STEP#4: Connect the GitLab server to the GitLab runner
GitLab calls this process of connecting the Server to Runner as “Registering the GitLab Runner to the Server”
You can follow the instructions for Linux in this link to do the same.
Scroll down to the Linux section and you will see something similar to this

Step# 4.1: Start the registration process
Enter the following command to start the registration process
sudo gitlab-runner register

As shown in the screenshots above, enter your Linux Machine’s IP address when prompted. Make sure you add “http://” before the IP address.
Once the IP address is entered, the next prompt appears asking you to enter a token, so let’s first go get a token from our GitLab server.
Step#4.2: Obtain token from GitLab Server
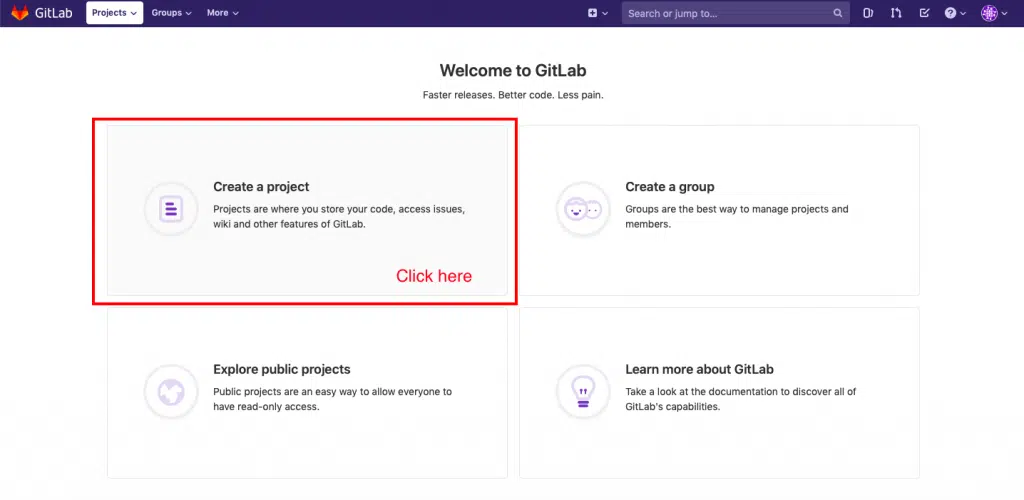
Go to your browser and enter the GitLab Server’s IP address. Once you have logged in you can create your first project by clicking on the respective pane as shown in the screenshot below.
Just give the project a name and click on the create project button. The other field should get populated automatically.

Once you click the button as shown in the screenshot above, you will be taken to your project page.
From there just click on Settings->CI/CD and scroll down a bit and click the “Expand” button next to “Runners” and you will find the token you need as shown in the screenshot below.

This token basically connects your project on the GitLab Server to the GitLab runner.
Step#4.3: Enter the token
Now that we have the token let’s enter it on the prompt

Once entering the token, you will be prompted to give the runner a description, go ahead and do that.
After that, you will be asked to enter some tags.
What are tags? Why are they needed for GitLab runners?
The better term for tags can be capabilities.
Consider this scenario.
Assume you are working in a large team of 1000 developers, who are doing say 50 different projects and your GitLab system has 100 different runners set up with several capabilities to do specific tasks. Some projects may need C compilers, while others may need python interpreters.
Now in order to connect a given project with a free-runner, we need some sort of parameter to tell the GitLab server that this particular free runner is capable of running the scripts needed for that particular job.
This is where tags come into the picture. By giving tags like “C” or “Python” a single runner can be connected to multiple projects and a single project can execute its jobs on several runners to ensure the best possible performance.
Using these tags the Gitlab server can find a runner with the specific capability to use for a given job. So give some suitable tags that will imply the capabilities of your runner.
Once that is done, you will be prompted to enter “executor”.
Executors are programs that run our CI/CD scripts. Type shell and press enter

you can test if gitlab-runner is running using the following command
sudo service gitlab-runner status

Test to see if everything works
By following the 4 steps above, you should have a set up with GitLab Server and Runner running on your system. Its time to test and see if everything works the way it is supposed to work!
First, let’s test the GitLab server by creating a repo and pushing it to the server.
Testing GitLab Server
STEP#1: Make a test git repo
Let’s make a simple git repo on a new folder on our Desktop and push it to the GitLab server.
So go over to your terminal and type in the following commands
cd
cd Desktop
mkdir test_project
cd test_project
touch test.c
The above lines of command are just the fancy way of creating a folder named test_project on your Desktop and a file named test.c inside it. You can also do it through the Graphical User Interface if you want to.
So next, please open the C file using your favorite text editor and type in a simple program for testing, something like the following.
#include <stdio.h>

int main()
{
	printf("Hello Embedded Inventors!");
	return 0;
}
Next, let’s initialize a git repository on our test_project folder. So go back to the terminal cd into the test_project folder and type in the following command
git init
You should receive a reply saying “Initialized empty Git repository”
Then add our test.c file and commit the changes using the following commands
git add .
git commit -m"first commit"
STEP#2: Push it to the server
Now that we have our git repo ready, let’s push it to our git server. To do that login to your GitLab and go to the project we created earlier. There GitLab shows us the commands needed to push our repo to the server.
First, let’s configure our name and email on the git repository to the ones set on the GitLab server
So enter the following command.
git config --global user.name "<enter your name here>"
git config --global user.email "<enter your email here>"
Next, we need to connect our server and our repository. To do that just enter the following commands
git remote add origin <your project URL>.git
In my case it is
git remote add origin http://10.0.2.15/EI/test-project.git
To find your project URL, just copy the address bar of your browser while you are on your project’s page in GitLab

Then push your git repo onto the GitLab using the command
git push -u origin master
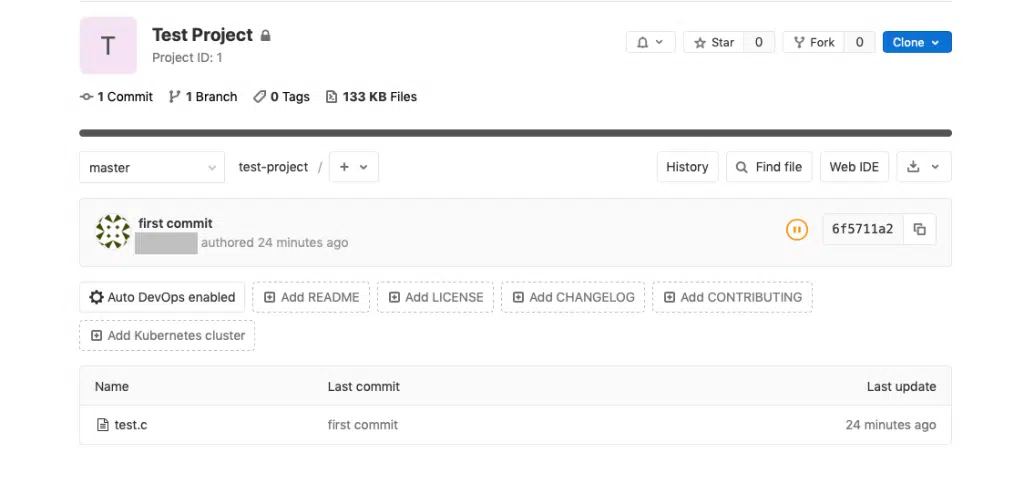
Once done, just refresh the page and you should be able to see your test project page in GitLab!
Testing GitLab Runner
STEP#3: Make a simple bash script to build the test.c file
Create a bash script on your project folder
cd
cd Desktop/test_project
touch build_script.sh
Edit it so that it looks something like this
#!/bin/bash
gcc test.c -o test
echo "Build completed"
STEP#4: Create and edit .gitlab_ci.yml to run the above script
What is .gitlab-ci.yml and why it is needed? This is the file that contains the instructions for the GitLab runners to execute the CI/CD tasks. It should be present in the project’s root folder. It can be used to test if a commit builds correctly, passes some unit tests and if it needs packaging and deployment.
You can learn more about how to configure it from the official quick start tutorial here
For the purpose of testing our installation let’s create a file named .gitlab-ci.yml in the test_project folder and put the following lines in there.
Make sure you are in the right directory
cd
cd Desktop/test_project
Create the file using the command
touch .gitalb-ci.yml
Open it with your favorite text editor and type the following lines into it.
build:
  script:
    - bash build_script.sh
  tags: [test]
The last line tells the GitLab server to use the GitLab runner with the tag named “test”. If you gave your GitLab runner installation a different tag, make sure you make the appropriate change to the above lines.
Also, make sure you use spaces instead of tabs at the beginning of the above lines.
Now add it to the git repository and push it to the Gitlab server
git add .
git commit -m"gitlab yml added"
git push
Now let’s get back to our GitLab server’s URL and see if it worked. Go to the project page and click on CI/CD
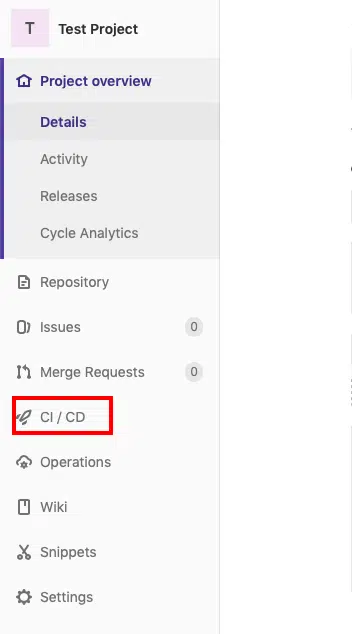
You will be taken to the pipeline page which shows the result of your latest commit.

It will take a minute or so before it completes the pipeline and as you can see in the screenshot above, mine took 41 seconds to complete and the status is “passed”
If you click on “jobs” under the CI/CD menu, you will be taken to another page which shows you more information about the execution of our yml file
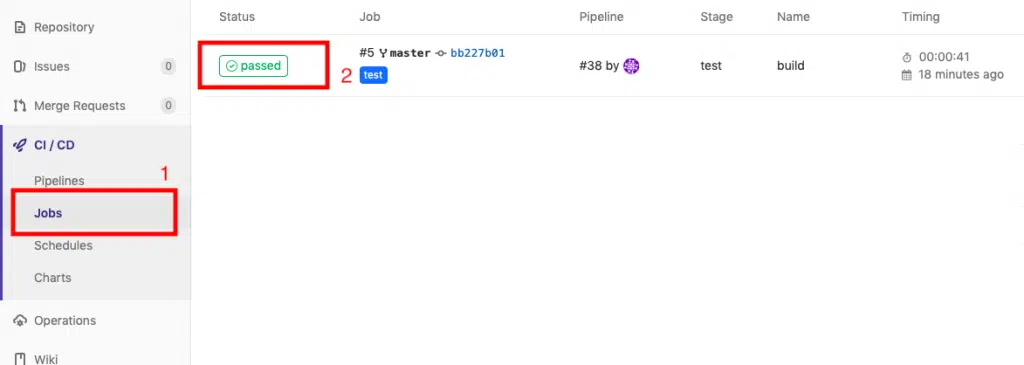
Next click on “passed” as shown in the screenshot above, this will take you to another page which will look something like this
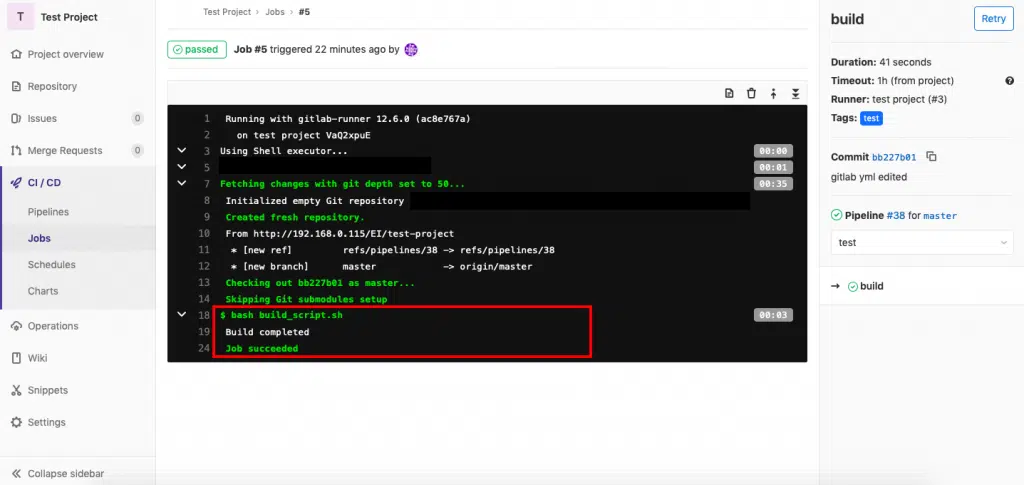
As you can see, our build_script.sh gets executed by the GitLab runner and it succeeds to compile our project.
And with that, I will conclude this tutorial!
I leave the rest to you to play, explore, experiment and learn GitLab!
I hope you guys enjoyed this article and learned something useful.
You can email us or contact us through this link if you have any questions or suggestions.
If you liked the post, feel free to share this post with your friends and colleagues!