
In part 1 of this series we learned the basics of user and group management and we also had a look at the 4 main files that we need to deal with to manage users and groups in Linux. If you haven’t already, I suggest reading the 1st part before continuing this one. You can find it in the link below.
Linux User & Group Management Tutorial: Part 1: Basic Concepts
In this part let’s learn how to add, modify and delete users in Linux. These days the distros usually have a graphical interface option to manage users and groups, but the functionality you get with the command line is usually more than the GUI one, for example, you can add multiple users using scripts in a very efficient manner as compared to making the accounts one after another using the GUI! So our focus will be on learning how to do it over the command line.
If you are interested in a particular section, you can jump to it using the table of contents below. Okay, let’s begin!
Managing User Accounts
Adding A New User
The command to use to add a new user on a Linux computer is useradd. Let’s look at the various options that can be used with this command by looking at the man page of useradd
man useradd
As you can seen in the screenshot above useradd has various options available using which we can fine tune the user account.
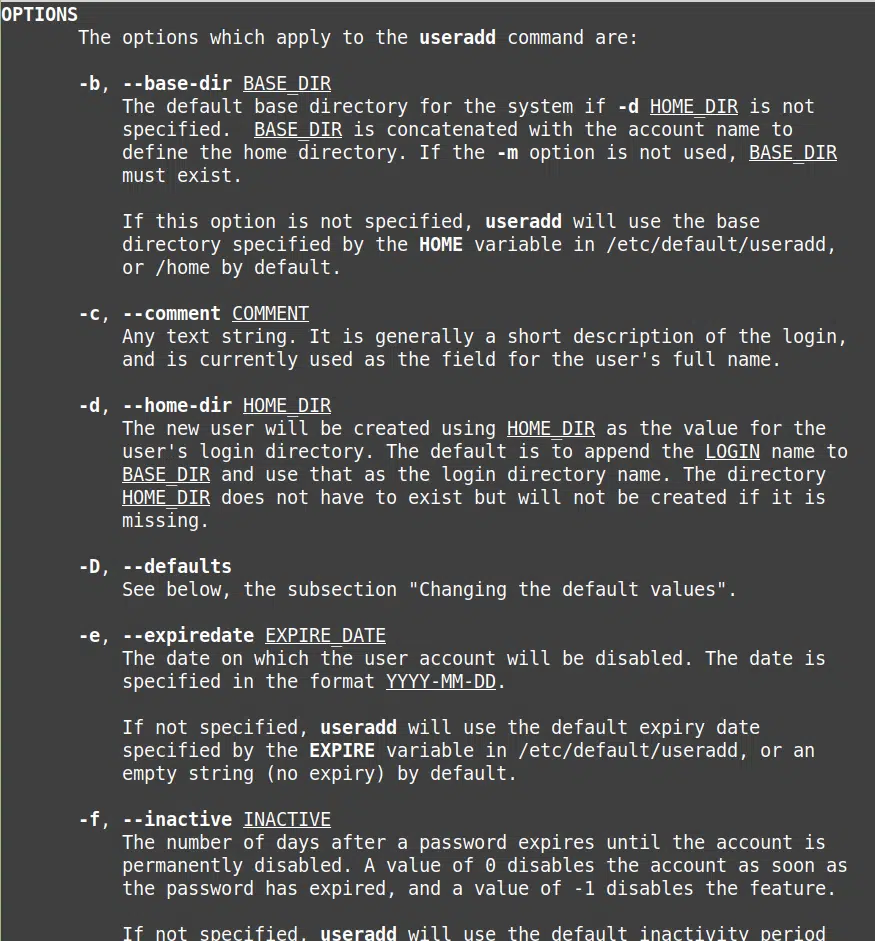
For now let’s look at the 3 most important options that we need to use.
-c option: This option as we can see in the screenshot above is for adding the official full name of the user
-m option: to create the user’s home directory with the given user’s name under the /home directory. This option is set ON by default on RHEL based distros and OFF on Ubuntu-based distros. In my Linux Mint (based on Ubuntu) I need to specify this option to create my user’s home directory
-s option: to specify the default shell for the user being added
There is another option that is particularly famous among sysadmins which is the -D option which can be used to set default options for all users on that computer!
Let’s use these options and add a new user to our Linux system named testuser as shown below
sudo useradd -c "Test User" -m -s /bin/bash testuser

You will be asked to enter your password and then the account will be created. Let’s confirm by having a look at /etc/passwd file and see if there is an entry for testuser in the passwd file!

As you can see in the screenshot above, indeed a user has been created and all it took was a single line of command! If you are following along, you can also confirm by looking at your home directory and you should see a folder created for the testuser..!!
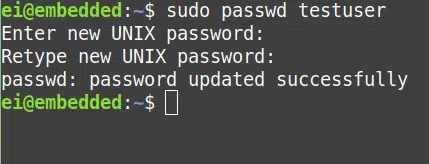
Okay so the user is created, but what about the password? You can set the password for the new user using the command passwd as shown in the screenshot below. You will be asked to enter the password twice and you will be done!
So now we have our testuser how to login to the new user account from the terminal? You can do using the su command. The syntax you need to use is
su - <user name>
and once you enter your password, the bash prompt will change indicating that you are now logged in as test user!
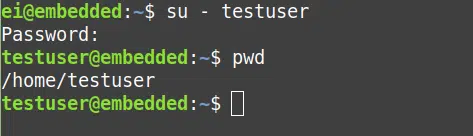
As you can see we have successfully logged in as testuser as evident from the bash prompt and the current working directory!
Naming conventions for usernames
Before moving onto the next part of this article, let’s take a moment to look at some of the naming conventions that we need to follow for giving usernames
- keep everything lowercase: User names are case sensitive, but some apps in Linux cannot differentiate between JohnK vs johnk. So to avoid these confusions its best to keep all the letters to lowercase
- don’t start with numbers: if you have 2 people with the same names, better add the numbers to the end rather than the start!
- avoid special characters: another practice to maintain compatibility with various software
- keep it less than or equal to 8 letters: as some apps can’t display more than 8 characters. If the user name is very long those apps usually go with the user ID instead, which is not considered pleasant for the human readers!
Modifying User Accounts
Reconfiguring Account parameters
Now that we have learned how to create user accounts on the command line in Linux, let’s next to have a look at how to manage and modify user accounts. If you forgot to configure some parameters at the time of registering accounts, then the usermod command is your next best friend!
All of the options we have seen above will work the same way here with a simple difference being that you will replace the useradd command with usermod command.
For example lets say we misspelled the name the first time around and you wish to redo it. You can do so like this
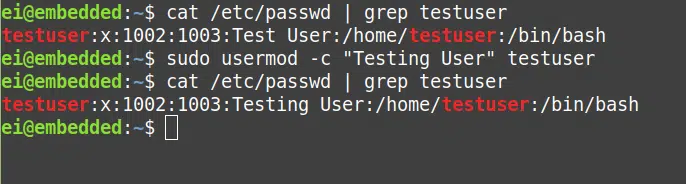
As you can see, the user’s full name has been changed from “Test User” to “Testing User” after using the usermod command!
Locking and Unlocking accounts
Other than reconfiguring parameters, sysadmins use the usermod command only for Locking and Unlocking user accounts.
This can be achieved using the -L option and -U option!
Let’s experiment using these options and see what happens!

The 2nd line above screenshot shows the entry for test user from the etc/shadows file. In the 3rd line we are locking the testuser using the -L option. Now have a look at line 5. Can you notice the difference between Lines 2 and 5?
If you look closely you can find a “!” symbol before the password hash. That “!” mark means that the account has been locked and the user cannot log in anymore.
Let’s try logging in into the testuser account again and see if that will work now.
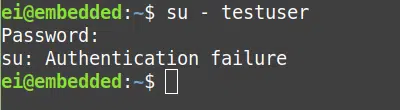
So even if the user enters the password correctly, he/she will not be able to login to their accounts!
Now let’s go ahead and unlock the account using the -U option.
As you can see in the screenshot above, once the account was unlocked using the U option, the “!” symbol has disappeared and we are able to login to the testuser account again!
Making a standard user into an admin user
This is another situation where the usermod command is useful. Admin users have sudo privileges and standard users don’t. If you wish to give a standard user with sudo privileges then all you need to do is add them to the sudo group using the -G option and –a option as shown below.
# to add sudo privileges to a user
sudo usermod -G sudo testuser
#to test if the command worked as expected
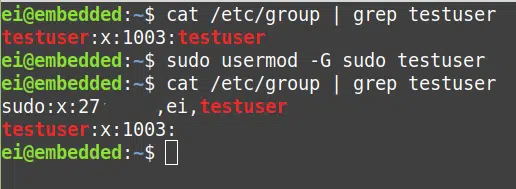
cat /etc/group | grep testuser
-G stands for additional groups and the -a option signifies appending, without it, all the other groups that the testuser previously belonged to will be deleted!
If the command was successful, you will be able to see that testuser is added to the sudo group as shown in the screenshot below.
Deleting Users
The only thing left to do now is to delete the user! You can do that using the userdel command.
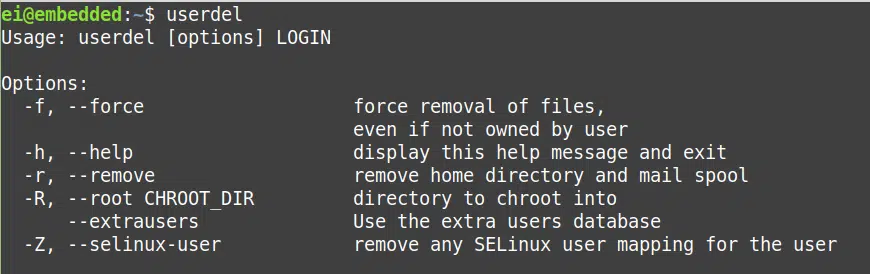
As you can see in the above screenshot, the command gives us 5 options to work with. The last 2 of these are advanced so let’s not worry about those.
We can delete out testuser using the command
#deletes the user and removes all the files owned by this particular user.
sudo userdel -fr testuser
After entering the above command try seeing if the entry related to that user is still present in the /etc/passwd file

As you can see in the screenshot above, our search returned nothing. In other words the user account was deleted! You can also confirm if all the files are gone by giving the command ls /home
Adding Groups
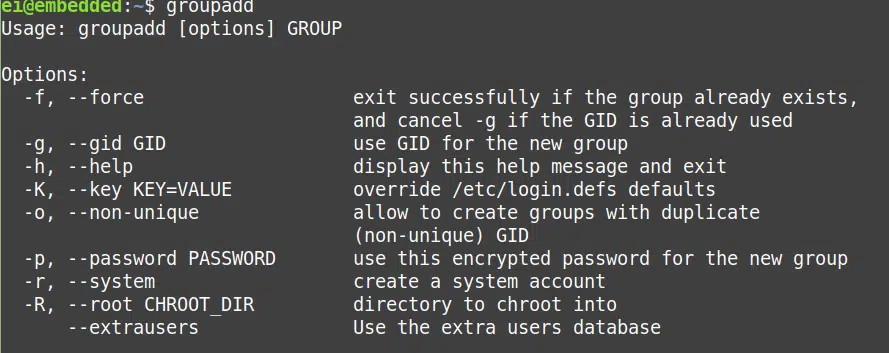
Similar to adding users, you can add your own groups too just to make the organization a bit easier in terms of access control of resources among several teams. You can do this by using the command groupadd as shown in the screenshot below.

As you can see initially there was no entry for a group named testgroup in the /etc/group file, and we have managed to create that group using the command groupadd!
In addition to that groupadd command supports the following options.
Deleting Groups
Deleting groups is as simple as deleting users, you just need to enter the command groupdel
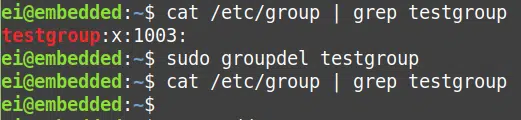
As you can see, we managed to delete the user and their entry in the /etc/group file using the groupdel command!
Apart from that groupdel also supports various options as shown below.

Always exercise caution when using the force option and try not to use options without getting enough info about them!
If you feel the info displayed with -h options don’t provide you with the required information, there are 2 more levels of documentation in Linux which include man and info commands!
If you are interested in learning more about Linux, be sure to check out my step by step plan to master Linux here.
And with that, I will conclude this article!
I hope you guys enjoyed this article and learned something useful.
If you liked the post, feel free to share this post with your friends and colleagues!
Related Articles
Here are some of my other articles that might interest you!
A Step By Step Plan To Learn Linux..!
Best Linux Distro For Workstation: Analysis and Comparison!!
A Complete Guide For Choosing A Distro For Your Computer’s Specs..!!
Best Distro For Software And Hardware Support: An Analysis.!!
Distro-Hopping, What, Why & How Explained!
Reasons Behind The Existence of SO MANY Linux Distros: An Analysis!